
Our Localhost to Staging development workflow using WordPress, Github, Plesk, and WP Migrate Pro
Throughout the years, we’ve seen many ways to migrate sites from localhost to staging. My personal favorite is not without its faults, but it has fared well for me for a few years now, and I hope it helps others who might be able to learn and create their own methods based off of parts of mine. Our primary staging server uses AWS with Plesk, though this process should work with a few tweaks on most setups.
I strictly use this process for building out on localhost and pushing to staging. This may be for the client to see the changes through revision sets, while still allowing you to do the heavy lifting in Localhost. This isn’t meant for use after passing off to the client, and I typically use other methods once the site has been pushed to production. This is because I strictly use it as a one-way process of Localhost -> Staging. If changes are made to the staging or production environment without passing through my localhost site (and getting committed), things can get out of whack quickly in regards to files and database being in sync. In other words, localhost changes to files and database will overwrite your staging site, so beware! With some planning and rules in place, this method can be used to allow multiple developers to work on different portions of the site. Using branches and pull requests with Git are simple enough to keep track of, but database changes can naturally cause some issues. For this, we typically check with each other and pass over “control” of the database changes. There are new solutions out there that are supposed to help with this, although I personally do not trust them as of yet. Also, we use this method for Private Repos, as these are client websites, but to each their own. I would also recommend trying this out with a fresh site, as this process can go wrong if not done properly. With enough command-line knowledge of git, you could also commit from the development server to Github, which would allow you to sync up your localhost.
Without further ado, let’s begin.
- First, let’s create a Repository. I typically recommend adding the whole WordPress root to the root of the repo. This is naturally a lot larger than just including certain folders, such as your theme, but can help prevent errors or issues, especially in the first few times of setting this up. Once you get a firm grasp on what’s going on, feel free to alter your method to suit your needs.
- Add .gitignore file. This is important!
- If wp-config.php and .htaccess exist in your repo (check on github if you’re unsure), you need to rename them to something like wp-config2.php, then add the .gitignore file and commit the change. After that, rename them back and commit the removal of those new files (wp-config2.php for example). Gitignore will not ignore files that are already present in the repo. It’s important to leave these out, as committing over our server’s wp-config file later in the process will replace our server’s database credentials and break the site (Error establishing database connection – D’oh!). Your .htaccess file needs to be left alone as well, or we may break your permalinks.
- Feel free to remove anything that’s super large and/or not beneficial to committing to Github. For example, backup zip files. You can add these to your gitignore. My .gitignore file can be found here: https://raw.githubusercontent.com/WebsitesDepot/gitignore/master/.gitignore
- First off, let’s add WP Migrate Pro to your plugins folder on your localhost site. If you don’t have it, I’d highly recommend it, as it works wonders for migrating databases. They also have some fancy new addons for migrating plugins and your uploads folder. This is our affiliate link – WP Migrate DB Pro
- In Plesk, click on “Git”.

- Add your repo (Use SSH) into the “Remove Git Repository” field. Make sure the info to the right appears to be mapped out to the correct place.

- If this is your first time using Git with this serve, you’ll need to copy your SSH Public Key.
- Open Github in a new tab and access your Profile -> Settings -> SSH and PGP Keys (https://github.com/settings/keys).
- Click “Add a new SSH Key”, and give this key a title. It’s important to label this as something meaningful, incase you need to revoke this key in the future. This essentially allows someone (the server in this case) to act on behalf of your account, so you should definitely remove it if you ever replace this server, or in general, don’t wish to allow this server to access your account anymore. In either case, copy in the SSH Key that you got from the server in the large box. If you get a warning that the key is already in use, this means that you have already added the key for this server, and can skip this part entirely.

- Once your key is added, go back to your “Add Git Repository” screen from step 5 and click “OK”.
- If all went well, within the next few seconds or so, your server should have pulled up your repo’s files.
- This means the initial connection is setup, and that the server can manually pull from Github. Next, we’ll setup Github to notify our server of any new commits so that it can retrieve them automatically.
- Go back to your Github Settings of the site in question on your Plesk panel (Same as Step 3).
- Click Repository Settings.
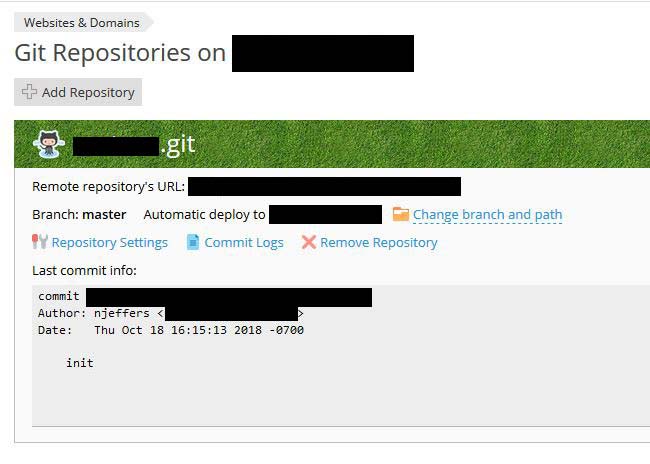
- Copy your Webhook URL. Note: Some servers on AWS may have an “internal” URL that isn’t a real URL that can be accessed from the Browser. This might say “compute.internal” or similar. What we’re going to do is replace everything up to the port with our URL from our address bar.
For example, if your Webhook URL is https://ip-999-99-99-999.us-east-2.compute.internal:8443, we would replace it with: https://99.99.99.99:8443. These are fake numbers, but you can get this IP from your address bar by comparing the positions of your Port 8443.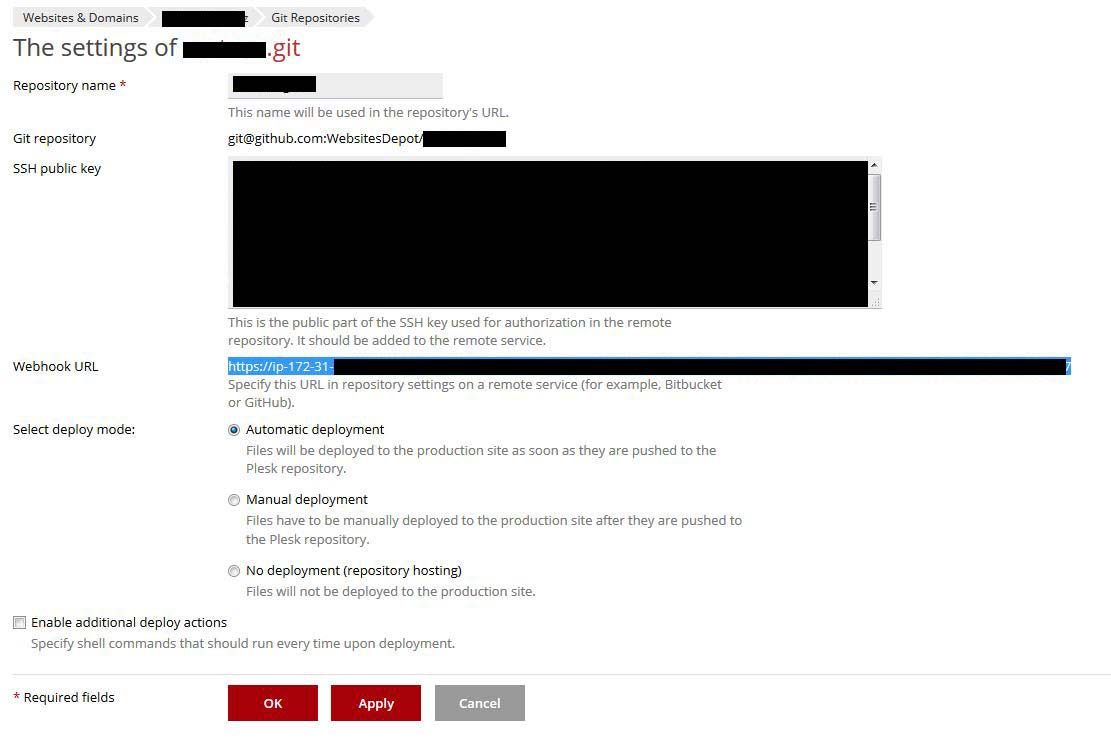
- Now that we have a proper Webhook URL, go to your Repo on Github, and click Settings -> Webhooks.
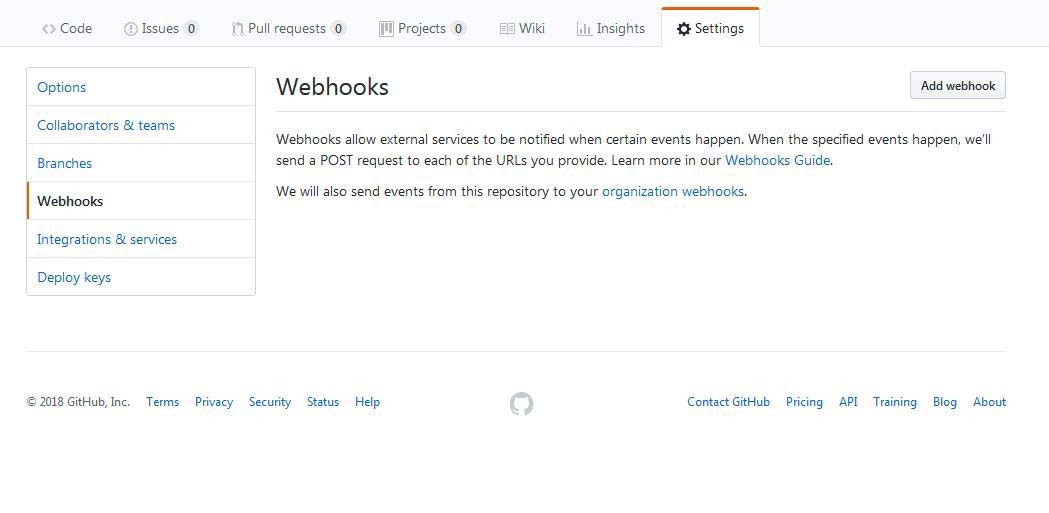
- Click Add Webhook. Add your Webhook URL into the “Payload URL” field. This should look something like: https://99.99.99.99:8443/modules/git/public/web-hook.php?uuid= and have a random string following the “uuid=”.
- If you don’t have SSL on the server, you can click “Disable” under SSL Verification though it’s not recommended. You may also have to disable it if using Let’s Encrypt.

- You should be able to go back to Settings -> Webhooks and see a green checkbox next to a delivery under “Recent Deliveries”. Each commit that you make should automatically get dispatched to the server! Feel free to do some test commits and check out the files on your server.
- Now that we have files working properly, now it’s time to get the database in sync.
- When accessing your domain, you should get the WordPress Setup screen. This is completely expected, as we haven’t setup a database yet (and we ignored the wp-config.php file in the beginning).
- Walk through your setup process. Don’t worry too much about the name of the site. The only thing to concern yourself with is the username and password, as we’ll need to login and setup WP Migrate. Everything else will be replaced once we sync the databases.
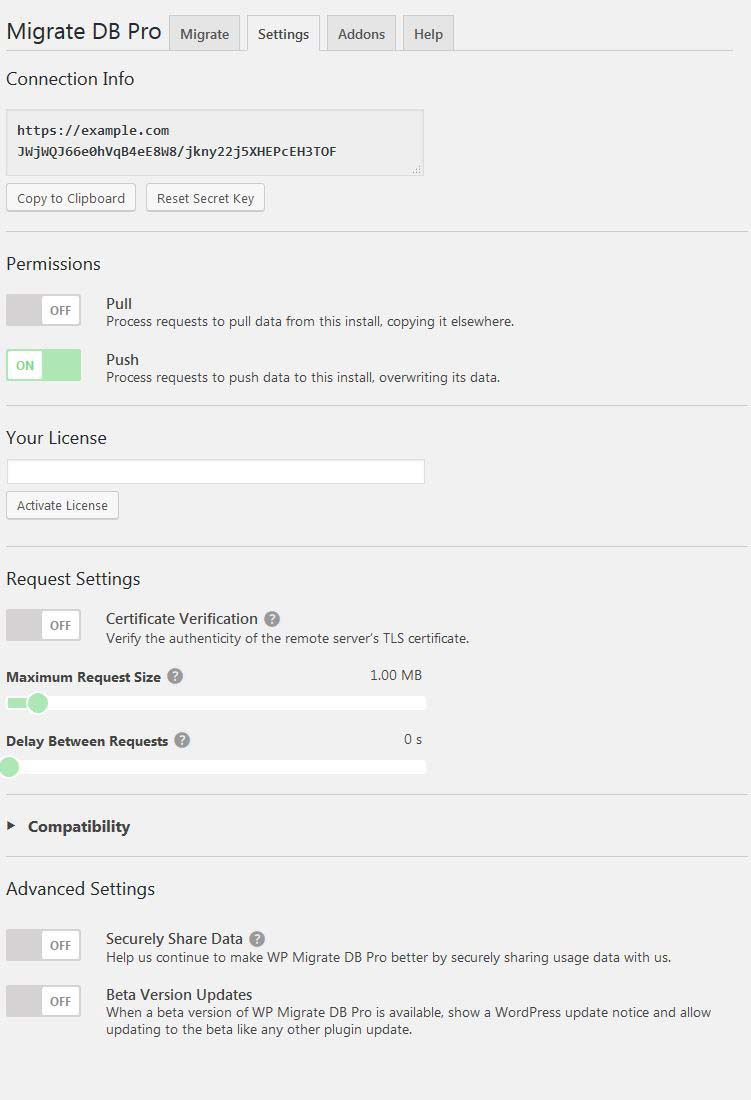
- After that, let’s login and go to Plugins, then activate WP Migrate Pro, and activate your License.
- On your Localhost, Access WP Migrate Pro -> Migrate. Click “Push”, and copy in your Connection info from your Staging site. If you get an error about not allowing remote connections, you’ll need to make sure “Pull” is enabled on your staging site. I typically check the box for “Save Migration Profile” to make the process easier in the future. Click “Push and Save”, and let WP Migrate work it’s magic!
- If all has gone well, your staging site should match your local copy. This includes everything Database-related, such as active plugins, themes, etc.